Partition Image is a Linux/UNIX utility which saves partitions in many formats (see below) to an image file. The image file can be compressed in the GZIP/BZIP2 formats to save disk space, and split into multiple files to be copied on removable floppies (ZIP for example), … Partitions can be saved across the network since version 0.6.0.When using Partimage, the partitions must be unmounted.


Partimage is veryuseful in the following situations
First you can restore your linux partition if there is a problem (virus, file system errors, manipulation error) . When you have a problem, you just have to restore the partition, and after 10 minutes, you have the original partition. You can write the image to a CD-R if you don’t want the image to use hard-disk space.
This utility can be used to install many identical computers. For example, if you buy 50 PCs, with the same hardware, and you want to install the same linux systems on all 50 PCs, you will save a lot of time. Indeed, you just have to install on the first PC and create an image from it. For the 49 others, you can use the image file and Partition Image’s restore function.
Supported file systems
ext2fs/ext3fs,Reiser3,FAT16/32,NTFS,HPFS,JFS,XFS,UFS(beta),HFS(beta)
Install Partimage in Ubuntu
First you need to make sure in your /etc/apt/sources.list file universe source list is enabled.
sudo apt-get install partimage
Install Partimage in Debian
#apt-get install partimage
This will complete the installation now
Before starting application you can check the all the available partitions using the following command
For Ubuntu Users
sudo fdisk -l
For debian users
#fdisk -l
Backup Partition
if you want to run the application use the following command
For Ubuntu Users
sudo partimage
For debian users
#partimage
Once it opens the application you should see similar to the following screen
Once you launch PartImage, use the Up and Down arrows to select which partition to back up.
Type the name of the path and file where you’re going to back up the partition.In this example I mounted the backup partition at /backup, I have to type /backup/serverbackup and not just serverbackup.
Action to be done should be Save partition into a new image file.
On the next screen, use no compression if you want the backup to be quicker. You really should use the Gzip or Bzip2 options only if your external hard drive or other backup partition is too small to hold the contents of the partition you’re backing up.
Now you should remember that the backup will save only the used space on the partition.So, if you have a 100 GB partition you’re backing up and only 11 GB of it is used, the partition image will be only 11 GB.
Now you press F5 to Continue for next screen here you need to enter a description of the save partition.
After PartImage examines the partition data for a while, it’ll give a summary of the partition.Here select ok and press enter
PartImage will start saving your partition to an image file on the backup partition and you can see the progress in the following screen.
Now you can see in the following screen backup partition operation completed successfully.
Then, you’ll be back to the terminal prompt.
Restore Partition
if you want to run the application use the following command
For Ubuntu Users
sudo partimage
For debian users
#partimage
Once it opens the application you should see similar to the following screen here you need to select the partition to restore,image file to use in my case i have saved my partition image file as serverbackup.000 if you want to menction .img extension at the time of backup it will save as .img file otherwise it will save as .000 extension,select restore partition from an image file option under action to be done select F5 for next screen
You should see the following screen select ok and press enter
Now you should see the following screen here you need to select the options The only extra option you can choose is Erase free blocks with zero values. If this option is enabled, all blocks which are not used are erased with zero bytes. This may be useful if you want to be sure that the data which were on the partition before this operation are fully erased. If this option is disabled, old data which was on currently unused blocks can be accessed (with some difficulty), because nothing is written on these blocks. These old data can be read with tools such as dd (GNU convert and copy) and press F5 to continue.
The partition to restore must have the same size as the saved partition. If the partition is smaller than the original one, the operation will fail. If it is bigger, space can be lost.
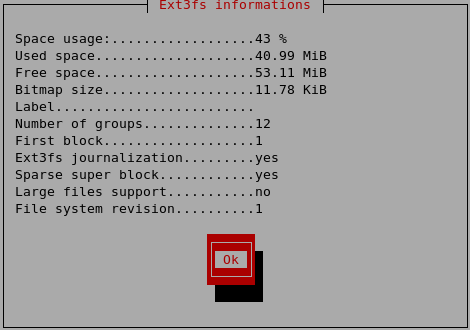
Now you should see the summary of restore partition information select ok and press enter
Now you should see the summary of restore partition information select ok and press enter
Confirm the image file you want to restore
Restore partition from an image file is in progress
Restore partition from an image file is completed successfully completed select ok and press enter Then, you’ll be back to the terminal prompt.
No comments:
Post a Comment